Hey there travel enthusiasts and welcome to my post where we will check out my 9 best places to visit in North America for first timers this year.
If you’re new to the continent, the biggest risk isn’t “doing it wrong”… it’s trying to do too much, too fast. North America is huge, so you want a mix of:
- Easy logistics (good transport, lots of signage, plenty of first-timer support)
- Iconic experiences (the stuff you’ve seen on postcards)
- Variety (cities, mountains, wildlife, and at least one “sun + beach” moment)
Below are the places I’d send a friend to if they had their first-ever North America trip coming up. I’ll also tell you where things get crowded or pricey, because that’s part of travel honesty.
East Coast Powerhouses (NYC + Washington, D.C.)
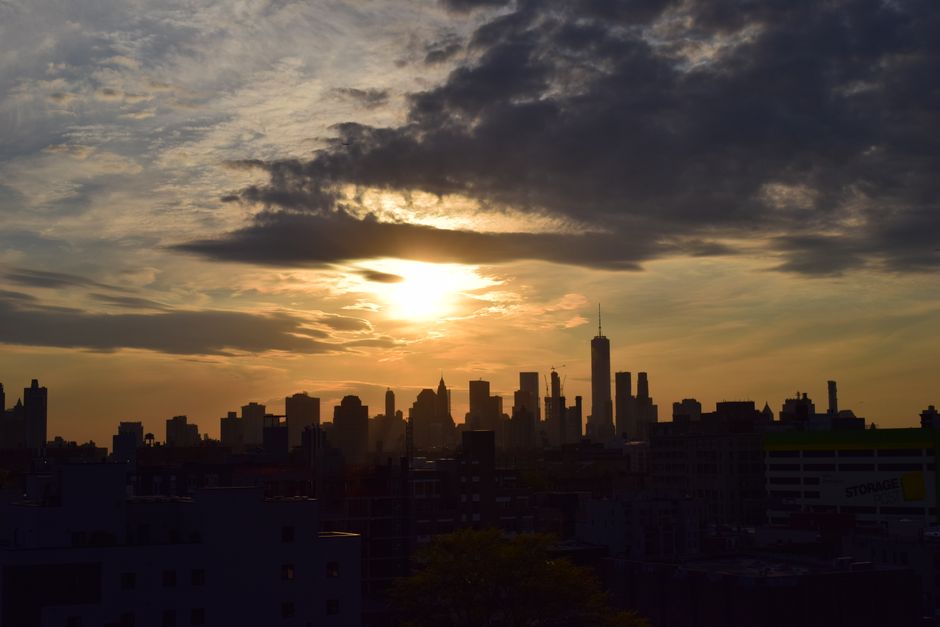
New York City: the “wow” day planner
New York is loud, fast, and sometimes frustrating—but it’s also one of the most rewarding cities on the planet for first-timers. You can do museums, skyline views, neighbourhood wandering, food markets, Broadway vibes… and you’ll still have days left.
What I’d prioritise (so you don’t burn out):
- Pick 2 neighbourhoods per day (not 6). Walkable areas like Manhattan’s West Village / SoHo / Midtown / Harlem make this easy.
- Do one “big ticket” sight early (late morning crowds can get intense). Think skyline viewpoints or iconic landmarks.
- Plan at least one full “wander meal”: bagels, pizza, tacos in small pockets—New York rewards unplanned stops.
Rough budget reality check (per person, excluding hotels):
- Budget-ish days: USD $70–$110 for food + transit + a couple of paid stops
- Comfort days: USD $120–$200 if you add shows/tours
Trade-off to know:
- You’ll spend time navigating crowds. If you hate queues, choose early starts and book timed entries where you can.
Washington, D.C.: free museums, big views
Washington, D.C. is one of my “easy win” cities: many of the best experiences are free, and it’s built for visitors with a clear layout around the National Mall.
Don’t miss:
- National Mall stroll: you’ll get photos just by walking the loop
- A museum day: rotate between art/history/science based on what you love
- Evening views: the city changes after dark—do a viewpoint or monument lights moment
Money snapshot:
- Museum entry: many are free (some special exhibits may charge)
- Typical paid add-ons: expect $15–$40 depending on what you choose
Trade-off to know:
- D.C. can be busy in spring and summer. If you’re going then, plan for security lines and expect timed passes to sell out.
A simple 4–6 day starter route
If you want a calm first-timer pace, here’s how I’d split it:
- Day 1: arrive + neighbourhood orientation + early dinner
- Day 2–3: NYC “big sights” days (1 major attraction + 1 neighbourhood day each)
- Day 4: transit to D.C. (or do this in reverse) + National Mall sunset walk
- Day 5: museum-heavy day
- Day 6 (optional): viewpoint/parks + relaxed last stroll
Bulletproof tip:
- Use one central hotel area per city (so you’re not crossing the whole metro daily). You’ll save energy and money.
Great Lakes Cities (Toronto + Chicago)
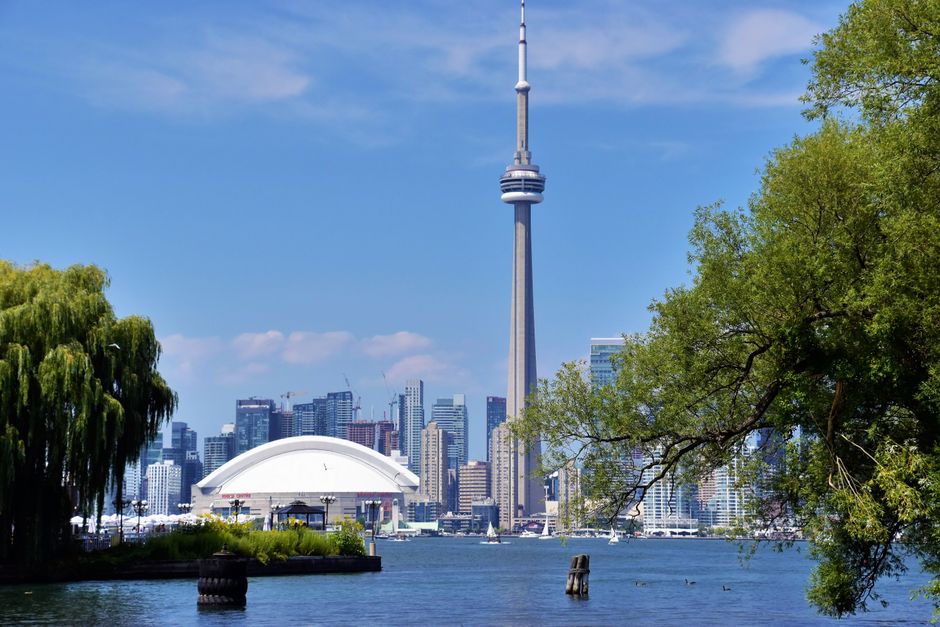
Toronto: the “everything, but manageable” city
Toronto is a fantastic first-timer pick because it feels cosmopolitan without being overwhelming. You’ve got major attractions, great food, and day trips that don’t require a whole logistics team.
Best first-timer moves:
- Do a skyline / waterfront combo (Toronto’s waterfront is a win)
- One big cultural day: art, history, or architecture—pick what excites you
- Explore neighbourhoods by vibe (West end for bustle, downtown core for energy, etc.)
Seasonal note:
- Summer (roughly Jun–Aug): lively but pricier and busier
- Shoulder seasons (spring/fall): often the best blend of weather and crowd levels
Rough costs (excluding hotels):
- USD $65–$130/day depending on how many paid sights you add
Trade-off to know:
- If you’re travelling in peak summer weekends, the city can feel like it’s operating at “festival mode.” Book reservations early.
Chicago: architecture + deep-dish energy
Chicago is one of those cities that surprises you in the best way. The skyline is iconic, the food culture is strong (yes, deep dish—if you want it), and the lakefront gives you a breather between sightseeing.
What to plan around:
- Architecture-focused experience (boat tour or walking route)
- Lakefront time: even if the weather’s not perfect, it’s worth a stroll
- Food crawl: hit a couple of neighbourhood spots rather than forcing one “perfect” restaurant
Budget reality:
- Daily spend: about USD $70–$160 depending on paid attractions and whether you’re doing tours
Trade-off to know:
- Winter can be brutal. If you’re not into cold weather, I’d aim for spring or early fall.
Weather and neighbourhood logic
Here’s how I keep Chicago/Toronto from feeling like chaos:
- Pick areas with easy walking + transit access, then base daily plans within 20–30 minutes of that.
- Plan one “indoors anchor” per day (museum, observation deck, big attraction). Then you can wander outdoors without stressing.
- Bring layers. Lake-effect wind is real in both places.
Pacific Canada (Vancouver + a Victoria day trip)
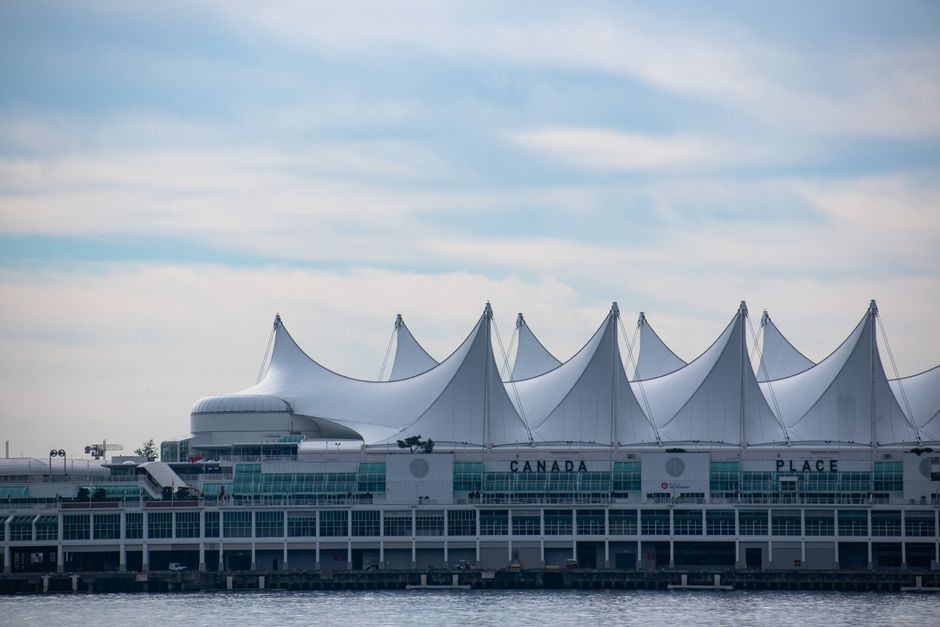
Vancouver: nature inside the city
Vancouver can feel like cheating—in a good way. You can be downtown for coffee and skyline views, then be at the ocean or in greenery faster than you expect.
Top first-timer checklist:
- Downtown + waterfront walk (simple, scenic, low effort)
- A neighbourhood wander (choose one area and go deep, not wide)
- One day trip or outdoor activity depending on your energy level
Money snapshot:
- Expect similar North American pricing to other major cities. If you’re watching costs, focus on free scenery and keep paid tours to 1 per day.
Trade-off to know:
- It’s popular. Summer and winter holiday periods can make restaurants and tours book up.
Victoria for harbour-and-gardens
If you have even a short window, Victoria is a great “extra” to pair with Vancouver. Think harbour views, classic streets, and that relaxed coastal pace.
How I’d do it:
- Do it as a day trip if you’re short on time.
- Use the trip to slow down—this isn’t the day for “rush sightseeing.”
What to focus on:
- Harbourfront strolling
- Garden/heritage-style browsing
- A sit-down lunch (don’t snack your way through—this is a slower place)
Trade-off to know:
- Weather can change quickly on the coast. Have a backup indoor option.
How to get around without overthinking it
My practical approach for Pacific Canada:
- Transit where it’s good (especially in Vancouver’s core)
- Ride-share/taxi when transit is annoying (late evenings, or if you’re going uphill)
- For day trips: check schedules ahead of time—coastal routes can be weather-sensitive
A travel comfort hack:
- If you’re doing multiple neighbourhoods, save one “anchor” spot each day (a viewpoint, museum, market). Everything else becomes flexible.
The Canadian Rockies (Banff & Lake Louise)

Banff town: the easy base for big scenery
Banff is touristy, but it’s touristy for a reason. It’s a clean, scenic base where you can do a mix of gentle sightseeing and serious hiking depending on your day.
First-timer “yes, do this” list:
- Explore Banff’s main strip on foot (you’ll get the vibe instantly)
- One easy hike or viewpoint trail (don’t force a long one on arrival day)
- Spend downtime by the water (the energy here is “go slow”)
Rough costs:
- Accommodation can be the priciest part of this whole trip.
- Daily spend varies wildly based on tours and where you stay—plan for a moderate to higher budget than cities.
Trade-off to know:
- Banff is crowded in peak summer. If you want peace, wake up early or travel in shoulder season.
Moraine Lake and Lake Louise: go early or go smart
Lake Louise is iconic—and that means it gets busy. Moraine Lake can be even more competitive (depending on access rules and parking/transport options).
My approach:
- Start early if you want photos without shoulder-to-shoulder crowds.
- Consider timed access / shuttle systems if they’re running for the day (rules can change by season).
What to aim for:
- Short walks with maximum payoff near viewpoints
- A flexible “Plan B” if weather rolls in (cloud cover can still look great, but you might want a different trail)
Trade-off to know:
- Parking can be a mess at peak times. It’s often easier (and less stressful) to base yourself and use local transport/tours.
Timing, parking, and crowd sanity
Here’s what helps most first timers in the Rockies:
- Season choice matters
- Summer: long daylight, lots open, but peak crowds
- Spring/Fall: often better crowd levels, variable weather
- Make mornings your sightseeing window
- Keep your afternoons flexible (weather + crowds can shift quickly)
Practical checklist:
- Bring a light rain layer (even if the forecast looks “fine”)
- Pack comfortable shoes—the views often require short-but-steep walking
- If you’re driving, start looking for parking options early rather than assuming you’ll “figure it out” on the day
Yellowstone: America’s Wildest First-Timer Park
Choose your loop (and don’t rush it)
Yellowstone is huge. The biggest mistake I see first timers make is trying to “see everything,” which turns into endless driving and missed highlights.
How to plan like a grown-up:
- Pick 1–2 main areas per day
- Drive with respect for wildlife and road conditions (sometimes speed limits are slow for a reason)
- Build your route around geothermal features and scenic overlooks you actually care about
First-timer “hit list” (by vibe, not by perfect map order):
- Grand geothermal moments (think big geysers and basins)
- A wildlife-focused day (more on that next)
- A scenic drive day with stops at short walks
Money/entry note:
- National park fees are often around tens of dollars per vehicle and can change—check the current rate when you plan.
- If you’re visiting multiple parks, compare whether a parks pass makes sense for your dates.
Trade-off to know:
- Yellowstone days can be long. If you’re not into early mornings, you’ll feel the “rush” pressure.
Wildlife spotting without the nonsense
Yes, you can see animals—but you’ve got to do it safely and realistically.
Do this:
- Use pullouts and keep distance (don’t treat it like a photo hunt with risky behaviour)
- Be patient—wildlife appears when it feels like it
- Go at dawn or dusk if you’re serious about spotting
Skip this (please):
- Trying to “outsmart” road safety for closer photos
- Ignoring posted rules near wildlife
A quick reality check:
- You might not see every animal you imagine, and that’s normal. Yellowstone is about the whole ecosystem, not a checklist.
Where to stay and how many days
Where you sleep can make or break your trip.
If you can, I recommend:
- Base in one area for 2–3 nights to reduce daily driving
- Choose lodging that’s close to your planned route
How many days?
- Minimum: 2 full days to get a real feel
- Comfortable first-timer: 3–4 days if you want to stop often and not feel stressed
Budgeting:
- In peak season, lodging can get pricey. If you see a good rate, don’t wait forever—Yellowstone is in demand.
Mexico for First Timers (Mexico City + Riviera Maya)
Mexico City: culture, food, and neighbourhood energy
Mexico City is one of the best first-timer destinations in North America because it’s big, diverse, and ridiculously interesting. You can pack days with museums, markets, street life, food tours, and day trips.
First-timer priorities:
- Choose a few neighbourhoods to explore deeply (they each have their own personality)
- Plan at least one food-focused experience (market or guided tour)
- Add one major cultural day: museum + a neighbourhood stroll after
Costs (rough guide, excluding flights):
- Mexico City can be great value. Daily budgets vary a lot, but many travellers can do well on a moderate spend—especially with street food and paid attractions spaced out.
Trade-off to know:
- It’s busy and big. If you try to cover the whole city, you’ll feel overwhelmed. Pick areas and move like a local: smaller plans, more enjoyment.
Riviera Maya: Tulum and the beach circuit
If you want a classic “sun + sea” chapter, the Riviera Maya delivers. You can do beaches, cenotes (swimming holes), ruins, and relaxed evenings.
A practical first-timer plan:
- Pick a base (or two max): spend most nights in one place so your days aren’t eaten by transfers
- Mix beach days with one adventure day
- Schedule ruins thoughtfully (heat and crowds can shape your experience)
What to do (choose based on your vibe):
- Beach time (obviously)
- Cenote swim or snorkel style activity
- One ruins day (if you want history + scenery)
- Sunset dinners where you can actually enjoy the evening
Trade-off to know:
- The area can get touristy and pricier in the most popular zones. If your budget’s tight, you’ll save money by looking at where you stay and how many guided add-ons you book.
Practical safety + getting around
I’m not going to scare you, but I will keep you smart.
General “first-timer wins”:
- Use official, reputable transport for airport transfers
- Keep cash handy, but don’t carry more than you need
- Take your time with plans—don’t accept rushed “you must do this now” offers
Getting around:
- Expect short transfers within areas and longer drives between zones.
- If you’re not a confident driver, consider doing day tours for specific outings (ruins, cenotes) so you don’t waste half a day coordinating.
Wrapping It Up: How to Build Your Own North America Starter Trip
My booking order (what to lock first)
If you do this, planning gets way less stressful.
Book early:
- Flights (obviously)
- Your first and last nights in each city
- Any time-sensitive tickets (big landmarks, popular tours, peak-season entry systems)
Book when you have a clearer plan:
- Day-by-day activities once you know your neighbourhood base
- Road-trip lodging only after you’ve roughly set your daily route
Keep flexible:
- Wander time (seriously—leave room for discovery)
- Weather-dependent hikes (especially in mountain regions)
Packing + culture cues that save you money and stress
A few practical pointers I always follow on first-timer trips:
- Bring a light daypack for water, layers, and snacks
- Pack comfortable walking shoes (cities + national parks will eat your feet otherwise)
- Carry a refillable water bottle where it’s safe to do so
- Keep a small cash reserve for places that don’t take cards consistently
Culture and common sense cues:
- In cities: use mornings for the busiest attractions
- In nature: start early and follow wildlife rules
- In Mexico: pace yourself with heat + hydration, and take transport seriously
If you take one thing from this post, it’s this: choose fewer places, enjoy them properly, and you’ll remember the trip—not the exhaustion.
Thanks for hanging out with me, travel buddy. If you tell me your month of travel and roughly how many days you’ve got, I can suggest a simple route (like East Coast + Rockies, or Cities + Mexico) that won’t have you sprinting across time zones. Safe travels!


